In this tutorial I will show you how to create a simple Database using Supabase AI and create a simple visual site to store books you have read.
tl&dr:
The page should look like this: http://juansoultrek.com/books
If you want the code, go to: https://github.com/juansoultrek/supabase-react-books
Ingredients needed :
- Create a Supabase account
Go to https://supabase.com/ and create an account.
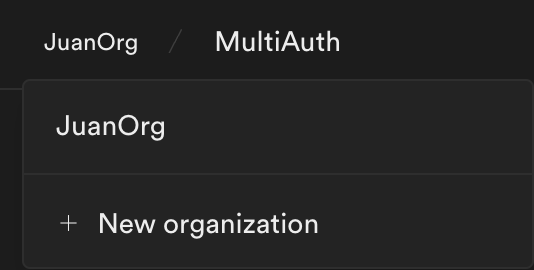
Then create a new organization
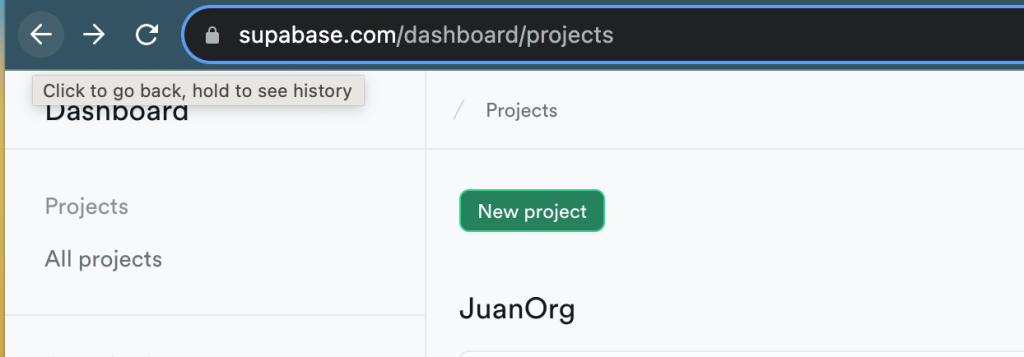
Create a new project
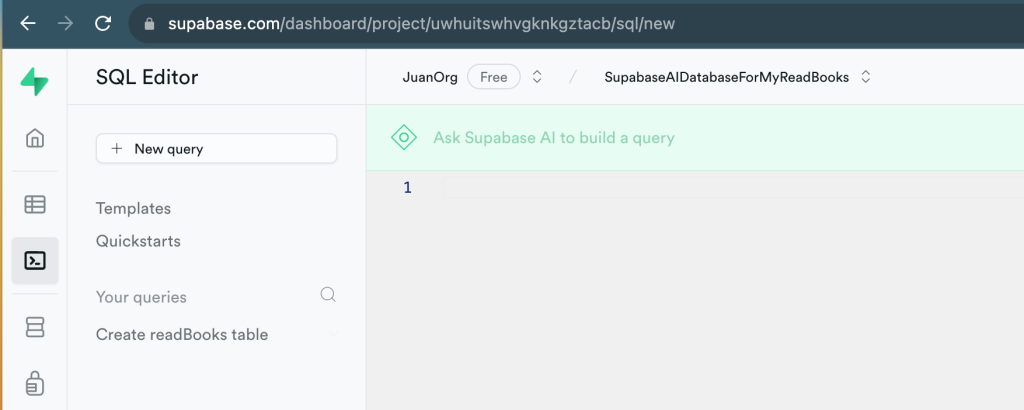
I named mine: SupabaseAIDatabaseForMyReadBooks
Why? Because Supabase has a new AI feature that allows you to automagically create a DB schema for you. Go to the SQl editor:
And let’s write this:
Build a readBooks table with columns for book id, title, author, genre, description, date purchased, date finished reading, physical or digital and personal notes
And magic:
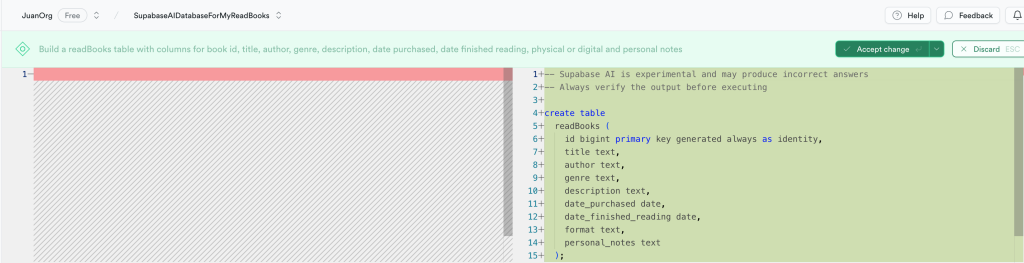
We now possess a simple schema for our readBooks table .
Click on the green Accept changes button and click RUN to execute the query.
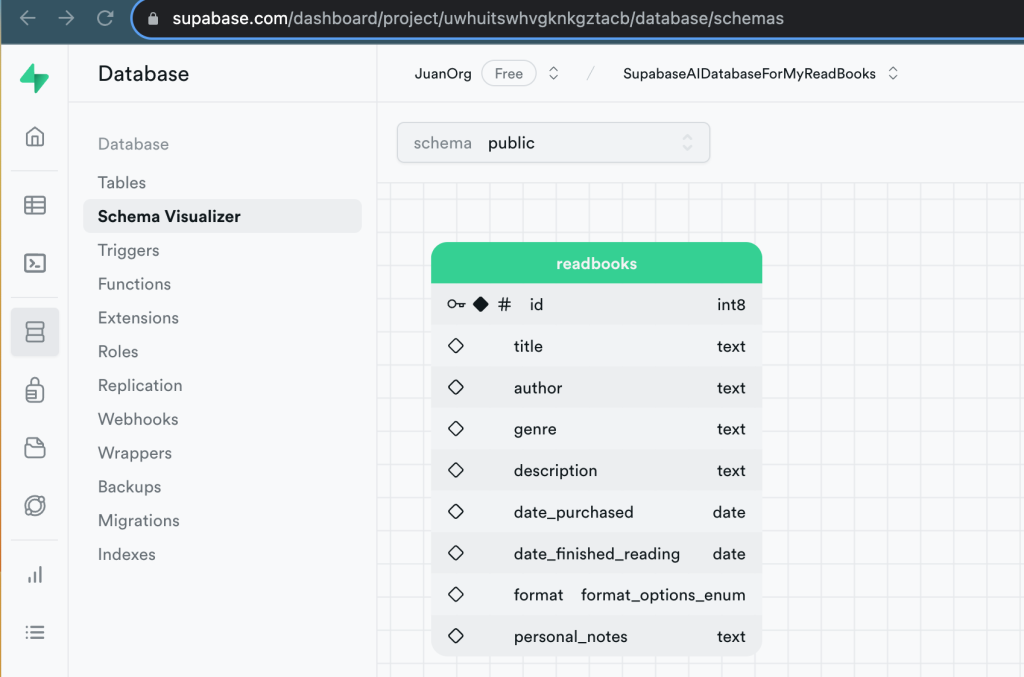
I actually want to use enum for the format of the book, and I want to limit if to physical or digital, so let’s modify the table:
-- Create the enum type if not already defined

CREATE TYPE format_options_enum AS ENUM ('physical', 'digital');

-- Alter the table to change the data type of the format column

-- to use the format_options_enum enum type

ALTER TABLE readBooks

ALTER COLUMN format

TYPE format_options_enum

USING format::format_options_enum;
If you run the query and then go to Database – Schema Visualizer, it should look like this:
Start a new react project using:
npx create-react-app <name of your app>
npm install react-bootstrap bootstrap @supabase/supabase.js
Create a a new file called supabaseClient.js and add the following:
import {createClient} from "@supabase/supabase-js";

export const supabase = createClient(
    process.env.REACT_APP_SUPABASE_CLIENT_URL,
    process.env.REACT_APP_SUPABASE_PROJECT_KEY);
Now create an .env file and add the following variables: ( follow the last tutorial to view how to get the credentials from supabas)
REACT_APP_SUPABASE_CLIENT_URL = <your client url?
REACT_APP_SUPABASE_PROJECT_KEY = <your project key?
Lets create a navigation menu called navBar.js:
import React, { useEffect, useState } from 'react';
import 'bootstrap/dist/css/bootstrap.min.css';
import { Navbar, Container, Nav } from 'react-bootstrap';
import { Link } from "react-router-dom";
import { useNavigate } from 'react-router-dom';
import { supabase } from './supabaseClient';

function NavBar() {
    const navigate = useNavigate();
    const [user, setUser] = useState({});

    useEffect(() => {
        async function getUserData() {
            const { data, error } = await supabase.auth.getUser();

            if (!error && data?.user) {
                setUser(data.user);
                console.log(data.user.email);
            }
        }
        getUserData();
    }, []);

    const handleLogout = async () => {
        await supabase.auth.signOut();
        window.location.reload();
        navigate("/books/read");
    }

    return (
        <Navbar bg="light" expand="lg">
            <Container>
                <Link to="/books/read" style={{ textDecoration: 'none' }}>
                    <Navbar.Brand>
                        My Read Books {user.email ? <span style={{ fontSize: '12px', color: 'blue' }}>{user.email}</span> : null}
                    </Navbar.Brand>
                </Link>

                <Navbar.Toggle aria-controls="basic-navbar-nav" />
                <Navbar.Collapse id="basic-navbar-nav">
                    <Nav className="mx-auto">
                        <Link to="/books/login" className={`nav-link ${user.email ? 'd-none' : ''}`}>
                            Login
                        </Link>
                        {user.email && (
                            <>
                                <Link to="/books/create" className="nav-link">
                                    Add Book
                                </Link>
                                <Link to="/books/edit" className="nav-link">
                                    Edit Book
                                </Link>
                                <Link to="/books/read" className="nav-link">
                                    Read Books
                                </Link>
                                <Link to="#" className="nav-link" onClick={handleLogout}>
                                    Log Out
                                </Link>
                            </>
                        )}
                    </Nav>
                    <Nav className="ml-auto">
                        <Nav.Item>Created by Juan</Nav.Item>
                    </Nav>
                </Navbar.Collapse>
            </Container>
        </Navbar>
    );
}

export default NavBar;
The navigation menu will allow to navigate between creating, reading, and editing/deleting a book.
Only authenticated users will be able to create and edit/delete books.
Let’s now create a login page, create a new file called loginBook.js
import React, { useState } from 'react';
import { supabase } from './supabaseClient';

function LoginForm() {
    const [loading, setLoading] = useState(false);
    const [email, setEmail] = useState('');
    const [message, setMessage] = useState('');
    const [alertVariant, setAlertVariant] = useState('success');

    const handleLogin = async (event) => {
        event.preventDefault();

        setLoading(true);
        const {error } = await supabase.auth.signInWithOtp({
            email: email,
            options: {
                shouldCreateUser: false
            }
        });

        if (error) {
            setMessage("Only valid users.");
            setAlertVariant("danger");
        } else {
            setMessage('Check your email for the login link!');
            setAlertVariant('success');
        }

        setLoading(false);
    }

    return (
        <div className="row justify-content-center">
            <div className="col-6">
                <div className="card">
                    <div className="card-body">
                        <h1 className="card-title">Login</h1>
                        {message && (
                            <div className={`alert alert-${alertVariant}`} role="alert">
                                {message}
                            </div>
                        )}
                        <p className="card-text">Sign in via a magic link with your email below</p>
                        <form onSubmit={handleLogin}>
                            <div className="form-group">
                                <input
                                    type="email"
                                    className="form-control"
                                    placeholder="Your email"
                                    value={email}
                                    required={true}
                                    onChange={(e) => setEmail(e.target.value)}
                                />
                            </div>
                            <div className="form-group">
                                <button className="btn btn-primary" disabled={loading}>
                                    {loading ? 'Loading' : 'Send magic link'}
                                </button>
                            </div>
                        </form>
                    </div>
                </div>
            </div>
        </div>
    );
}

export default LoginForm;
Make sure to add authorized users in your Supabase account, so they will be able to login via Magic Links. Just got to Dashboard / Authentication and create an authenticated user.
Now we will create the Router, that will help to navigate and check if we can navigate to certain route.
Add the following, to the existing App.js file
import { BrowserRouter as Router, Route, Routes, Navigate } from 'react-router-dom';
import NavBar from './navBar';
import CreateBook from './createBook';
import ReadBook from './readBook';
import EditBook from './editBook';
import LoginBook from './loginBook';
import ProtectedRoute from './protectedRoute';

function App() {
return (
<Router>
<div>
<NavBar />
<Routes>
<Route path="/books/create" element={<ProtectedRoute element={<CreateBook />} />} />
<Route path="/books/read" element={<ReadBook />} />
<Route path="/books/edit" element={<ProtectedRoute element={<EditBook />} />} />
<Route path="/books/login" element={<LoginBook />} />
<Route path="/books/*" element={<Navigate to="/books/read" />} />
</Routes>
</div>
</Router>
);
}

export default App;
Let’s create the protected Route file, that will authorize the use of certain pages. Create a file named protectedRoute.js
import React, { useState, useEffect } from 'react';
import { Navigate } from 'react-router-dom';
import { supabase } from './supabaseClient';

function ProtectedRoute({ element }) {
const [session, setSession] = useState(null);
const [loading, setLoading] = useState(true);

useEffect(() => {
supabase.auth.getSession().then(({ data: { session } }) => {
setSession(session);
setLoading(false);
});

supabase.auth.onAuthStateChange((_event, session) => {
setSession(session);
});
}, []);

if (loading) {
return <p>Loading...</p>;
}

if (session) {
return element;
} else {
return <Navigate to="/login" />;
}
}

export default ProtectedRoute;
Now let’s create the input fileds to add data to the Postgres database. Create a new file called createBooks.js:
import React, { useState } from 'react';
import { Container, Form, Row, Col, Button } from 'react-bootstrap';
import { supabase } from "./supabaseClient";
import { Alert } from 'react-bootstrap';


function CreateBook() {
    const [title, setTitle] = useState("");
    const [author, setAuthor] = useState("");
    const [genre, setGenre] = useState("");
    const [description, setDescription] = useState("");
    const [datePurchased, setDatePurchased] = useState("");
    const [dateFinishedReading, setDateFinishedReading] = useState("");
    const [format, setFormat] = useState("");
    const [personalNotes, setPersonalNotes] = useState("");

    const [insertSuccess, setInsertSuccess] = useState(false);
    const [message, setMessage] = useState('');
    const [alertVariant, setAlertVariant] = useState("success");

    const scrollToTop = () => {
        window.scrollTo(0, 0);
    };

    const resetForm = () => {
        setTitle("");
        setAuthor("");
        setGenre("");
        setDescription("");
        setDatePurchased("");
        setDateFinishedReading("");
        setFormat("");
        setPersonalNotes("");

        console.log('resetForm called')
    };

    const addNewBook = async () => {

        if (
            title.trim() === '' ||
            author.trim() === '' ||
            genre.trim() === '' ||
            description.trim() === '' ||
            datePurchased.trim() === '' ||
            dateFinishedReading.trim() === '' ||
            format === ''
        ) {
            setMessage('Please fill out all required fields.');
            setAlertVariant('danger');
            scrollToTop();
        } else {
            try {
                const {error} = await supabase
                    .from("readbooks")
                    .insert({
                        title,
                        author,
                        genre,
                        description,
                        date_purchased: datePurchased,
                        date_finished_reading: dateFinishedReading,
                        format_options: format,
                        personal_notes: personalNotes
                    })
                    .single();
                if (error) throw error;
                setInsertSuccess(true);
                resetForm();
                setMessage('Book added successfully.');

                setAlertVariant("success");
                scrollToTop();

                setTimeout(() => {
                    setInsertSuccess(false);
                }, 3000);
            } catch (error) {
                console.log("This is the error:" + error.message);
                setMessage('An error occurred while adding the book.');
                setAlertVariant("danger");
                scrollToTop();
                console.error('Error:', error);
            }
        }
    };

    return (
        <Container>
            {insertSuccess && (
                <Alert variant={alertVariant}>
                    {message}
                </Alert>
            )}

            {!insertSuccess && message && (
                <Alert variant={alertVariant}>
                    {message}
                </Alert>
            )}

            <Row>
                <Col xs={12} md={8}>
                    <h3>Add Book For Supabase Database</h3>
                    <Form.Label>Title</Form.Label>
                    <Form.Control
                        type = "text"
                        id="title"
                        value={title}
                        onChange={(e) => setTitle(e.target.value)}
                    />
                    <Form.Label>Author</Form.Label>
                    <Form.Control
                        type = "text"
                        id="author"
                        value={author}
                        onChange={(e) => setAuthor(e.target.value)}
                    />
                    <Form.Label>Genre</Form.Label>
                    <Form.Control
                        type = "text"
                        id="genre"
                        value={genre}
                        onChange={(e) => setGenre(e.target.value)}
                    />
                    <Form.Label>Description</Form.Label>
                    <Form.Control
                        as = "textarea"
                        id="description"
                        value={description}
                        rows={3}
                        onChange={(e) => setDescription(e.target.value)}
                    />
                    <Form.Label>Date Purchased</Form.Label>
                    <Form.Control
                        type = "date"
                        id="datePurchased"
                        value={datePurchased}
                        onChange={(e) => setDatePurchased(e.target.value)}
                    />
                    <Form.Label>Date Finished Reading</Form.Label>
                    <Form.Control
                        type = "date"
                        id="dateFinishedReading"
                        value={dateFinishedReading}
                        onChange={(e) => setDateFinishedReading(e.target.value)}
                    />
                    <Form.Label>Personal Notes</Form.Label>
                    <Form.Control
                        as = "textarea"
                        id="personalNotes"
                        value={personalNotes}
                        rows={3}
                        onChange={(e) => setPersonalNotes(e.target.value)}
                    />
                    <Form.Label>Format</Form.Label>
                    <Form.Control
                        as="select"
                        value={format}
                        onChange={e => setFormat(e.target.value)}
                    >
                        <option value="">Select an option:</option>
                        <option value="digital">Digital</option>
                        <option value="physical">Physical</option>
                    </Form.Control>

                    <br></br>
                    <Button onClick={ () => addNewBook() }>Add Book</Button>
                </Col>
            </Row>

        </Container>

    );
}

export default CreateBook;
We might also want to edit the data , let’s create a file called editBooks.js
import React, { useState, useEffect } from 'react';
import { Container, Form, Row, Col, Button, Table, Alert } from 'react-bootstrap';
import { supabase } from './supabaseClient';
function EditBook() {
const [books, setBooks] = useState([]);
const [editMode, setEditMode] = useState(false);
const [selectedBook, setSelectedBook] = useState({});
const [updateSuccess, setUpdateSuccess] = useState(false);
const [alertVariant, setAlertVariant] = useState('success');
const [message, setMessage] = useState('');
useEffect(() => {
const fetchBooks = async () => {
const { data, error } = await supabase.from('readbooks').select('*');// eslint-disable-line no-unused-vars
if (error) {
console.error('Error fetching books:', error);
} else {
setBooks(data);
}
};
fetchBooks();
}, [updateSuccess]); // Update the effect dependency
const handleEdit = (book) => {
setEditMode(true);
// Clone the book object to avoid modifying the original book
setSelectedBook({ ...book });
};
const scrollToTop = () => {
window.scrollTo(0, 0);
};
const handleSave = async () => {
const {error } = await supabase
.from('readbooks')
.update({
title: selectedBook.title,
author: selectedBook.author,
genre: selectedBook.genre,
description: selectedBook.description,
date_purchased: selectedBook.date_purchased,
date_finished_reading: selectedBook.date_finished_reading,
format_options: selectedBook.format_options,
personal_notes: selectedBook.personal_notes,
})
.eq('id', selectedBook.id);
if (error) {
console.error('Error updating book:', error);
setMessage('An error occurred while updating the book.');
setAlertVariant('danger');
scrollToTop();
} else {
setEditMode(false);
setUpdateSuccess(true);
setMessage('Book updated successfully.');
setAlertVariant('success');
scrollToTop();
}
};
return (
<Container>
{updateSuccess && (
<Alert variant={alertVariant}>
{message}
</Alert>
)}
{!updateSuccess && message && (
<Alert variant={alertVariant}>
{message}
</Alert>
)}
<Row>
<Col xs={12} md={8}>
<h3>Read Books</h3>
{books.length === 0 ? (
<p>No books to display.</p>
) : (
<Table striped bordered hover>
<thead>
<tr>
<th>Title</th>
<th>Author</th>
<th>Genre</th>
<th>Description</th>
<th>Date Purchased</th>
<th>Date Finished Reading</th>
<th>Format Options</th>
<th>Personal Notes</th>
<th>Actions</th>
</tr>
</thead>
<tbody>
{books.map((book) => (
<tr key={book.id}>
<td>
{editMode && selectedBook.id === book.id ? (
<Form.Control
type="text"
value={selectedBook.title}
onChange={(e) => setSelectedBook({ ...selectedBook, title: e.target.value })}
/>
) : (
book.title
)}
</td>
<td>
{editMode && selectedBook.id === book.id ? (
<Form.Control
type="text"
value={selectedBook.author}
onChange={(e) => setSelectedBook({ ...selectedBook, author: e.target.value })}
/>
) : (
book.author
)}
</td>
<td>
{editMode && selectedBook.id === book.id ? (
<Form.Control
type="text"
value={selectedBook.genre}
onChange={(e) => setSelectedBook({ ...selectedBook, genre: e.target.value })}
/>
) : (
book.genre
)}
</td>
<td>
{editMode && selectedBook.id === book.id ? (
<Form.Control
as="textarea"
value={selectedBook.description}
onChange={(e) => setSelectedBook({ ...selectedBook, description: e.target.value })}
/>
) : (
book.description
)}
</td>
<td>
{editMode && selectedBook.id === book.id ? (
<Form.Control
type="date"
value={selectedBook.date_purchased}
onChange={(e) => setSelectedBook({ ...selectedBook, date_purchased: e.target.value })}
/>
) : (
book.date_purchased
)}
</td>
<td>
{editMode && selectedBook.id === book.id ? (
<Form.Control
type="date"
value={selectedBook.date_finished_reading}
onChange={(e) => setSelectedBook({ ...selectedBook, date_finished_reading: e.target.value })}
/>
) : (
book.date_finished_reading
)}
</td>
<td>
{editMode ? (
<Form.Control
as="select"
value={selectedBook.format_options} // Set the value based on the selected book
onChange={(e) =>
setSelectedBook({
...selectedBook,
format_options: e.target.value,
})
}
>
<option value="physical">Physical</option>
<option value="digital">Digital</option>
</Form.Control>
) : (
book.format_options
)}
</td>
<td>
{editMode && selectedBook.id === book.id ? (
<Form.Control
as="textarea"
value={selectedBook.personal_notes}
onChange={(e) => setSelectedBook({ ...selectedBook, personal_notes: e.target.value })}
/>
) : (
book.personal_notes
)}
</td>
<td>
{editMode && selectedBook.id === book.id ? (
<Button variant="success" onClick={handleSave}>
Save
</Button>
) : (
<Button variant="primary" onClick={() => handleEdit(book)}>
Edit
</Button>
)}
</td>
</tr>
))}
</tbody>
</Table>
)}
</Col>
</Row>
</Container>
);
}
export default EditBook;
And finally the default page, that will show the actual books. Create a file named readBooks.js
import React, { useState, useEffect } from 'react';
import { Container, Row, Col, Table } from 'react-bootstrap';
import { supabase } from './supabaseClient';

function ReadBook() {
    console.log('api_url-->' +process.env.REACT_APP_SUPABASE_CLIENT_URL);

    const [books, setBooks] = useState([]);

    useEffect(() => {
        // Fetch existing books from the database and populate the books state.
        const fetchBooks = async () => {
            const { data, error } = await supabase.from('readbooks').select('*');
            if (error) {
                console.error ('Error fetching books:', error);
            } else {
                setBooks(data);
            }
        };

        fetchBooks();
    }, []);

    return (
        <Container>
            <Row>
                <Col xs={12} md={8}>
                    <h3>Read Books</h3>
                    {books.length === 0 ? (
                        <p>No books to display.</p>
                    ) : (
                        <Table striped bordered hover style={{ width: '100%' }}>
                            <thead>
                            <tr>
                                <th>Title</th>
                                <th>Author</th>
                                <th>Genre</th>
                                <th>Description</th>
                                <th>Date Purchased</th>
                                <th>Date Finished Reading</th>
                                <th>Format Options</th>
                                <th>Personal Notes</th>
                            </tr>
                            </thead>
                            <tbody>
                            {books.map((book) => (
                                <tr key={book.id}>
                                    <td>{book.title}</td>
                                    <td>{book.author}</td>
                                    <td>{book.genre}</td>
                                    <td>{book.description}</td>
                                    <td>{book.date_purchased}</td>
                                    <td>{book.date_finished_reading}</td>
                                    <td>{book.format_options}</td>
                                    <td>{book.personal_notes}</td>
                                </tr>
                            ))}
                            </tbody>
                        </Table>
                    )}
                </Col>
            </Row>
        </Container>
    );
}

export default ReadBook;
The page should look like this: http://juansoultrek.com/books
If you want the code, go to: https://github.com/juansoultrek/supabase-react-books