In this tutorial I am going to show you how to use Supabase and React to authenticate to multiple providers.
Ingredients needed :
Create a Supabase account
Go to https://supabase.com/ and create an account.
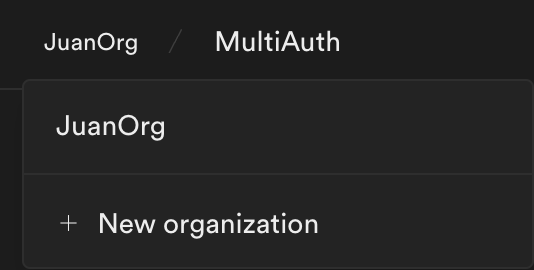
Then create a new organization
Then go to Authentication – URL Configuration and setup the following Redirect URL:http://localhost:3000/success

Let’s start with Discord:
Go to : https://discord.com/developers/applications
And click on New Application:

Make sure to copy and secure the APPLICATION ID and PUBLIC KEY
Now, let’s go back to Supabase and go to:
Then go to Authentication – Providers – Auth Providers
Enable Discord and add the Client ID and Client Secret

In this same page copy the Supbase redirect URl ( Callback URL) and go back to Discord and paste it.

Setup a new react app in your favorite IDE, type:npx create-react-app <name-of-your-app>
After it finishes installing, cd into client
cd <name-of-your-app>
And type:
npm install @supabase/auth-ui-react @supabase/supabase-js @supabase/auth-ui-shared
This will install Auth UI, it is a pre-built React component for authenticating users.
And let’s also install to handle the local routes:
npm install react-router-dom
Make sure your App.js file looks like this:
import React from 'react';
import './App.css';
import  { BrowserRouter as Router, Routes, Route} from "react-router-dom";
import Login from "./pages/loginPage";
import Success from "./pages/successPage";


function App() {
  return (
      <Router>
          <Routes>
              <Route path="/" element={<Login/>} />
              <Route path="/success" element={<Success/>} />
          </Routes>
      </Router>
  );
}

export default App;
You can create a folder to store the login and success page.
On your src directory create a folder named pages and create a loginPage.js and a successPage.js
Create a login and success function like this one:
function Success() {
    return (
        <div className="App">
            <header className="App-header">
                <h1>Success</h1>
            </header>
        </div>
    );
}

export default Success;
If you visit http://localhost:3000/success
You should see the success page:

Now let’s install this package: npm i –save-dev dotenv
So we can save our variable in an .env file
Create the file, and add the following variables:REACT_APP_SUPABASE_CLIENT_URL =
REACT_APP_SUPABASE_PROJECT_KEY
In the loginPage.js add the supabase client credentials, the file should look like this:
import {createClient} from "@supabase/supabase-js";
import {useNavigate} from "react-router-dom";
import {Auth} from "@supabase/auth-ui-react";
import {ThemeSupa,} from '@supabase/auth-ui-shared'

const supabase = createClient(
    process.env.REACT_APP_SUPABASE_CLIENT_URL,
    process.env.REACT_APP_SUPABASE_PROJECT_KEY
)
function Login() {
    const navigate = useNavigate();
    supabase.auth.onAuthStateChange(async (event) =>{
        if (event === "SIGNED_IN") {
            navigate("/success");
        } else {
            navigate("/");
        }
    })
    return (
        <div className="App">
            <header className="App-header">
                <Auth
                    supabaseClient={supabase}
                    appearance={{ theme: ThemeSupa }}
                    providers={['discord']}
                />
            </header>
        </div>
    );
}

export default Login;
The login should look like this:

If you go ahead and login to Discord, you will be redirected to the Success page.
Now lets add a final piece of code so we can sign out the user.
import {createClient} from "@supabase/supabase-js";
import {useNavigate} from "react-router-dom";
import React, { useEffect, useState} from "react";


const supabase = createClient(
    process.env.REACT_APP_SUPABASE_CLIENT_URL,
    process.env.REACT_APP_SUPABASE_PROJECT_KEY
)
function Success() {

    const [user, setUser] = useState({});
    const navigate = useNavigate();

    useEffect( () => {
        async function getUserData(){
            await supabase.auth.getUser().then((value) => {
                if(value.data?.user){
                    console.log(value.data.user)
                    setUser(value.data.user);
                }

            })
        }
        getUserData();
    }, []);

    async function signOutUser() {
        const {error} = await supabase.auth.signOut();
        navigate("/");
    }


    return (
        <div className="App">
            <header className="App-header">
                <h1>Success</h1>
                <button onClick={ () =>signOutUser()}>Sign Out
                </button>
            </header>
        </div>
    );
}

export default Success;
This will create a Sign Out button:
