Last time I wrote, I mentioned that I wanted to learn how to receive an SMS using Ring Central’s API and I did an example using RingCentral + ngrok + Formstack, you can check it out here.
I also mentioned that I wanted to develop something I could use in my own home, so this time I decided to use SMS Ring Central’s API to notify me when a light has turned on in my house.
And why the hell would anyone mind if your lights are on?
Well I could enumerate a few examples, but you can use your imagination for that.
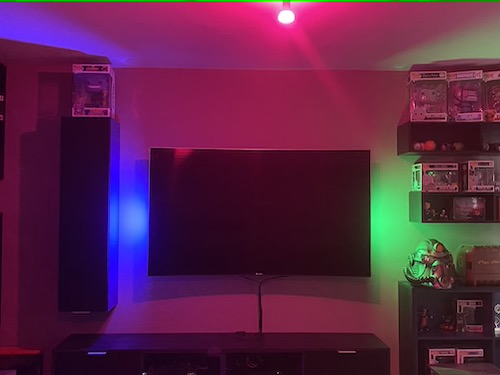
I have a few Philips HUE lights in my home, most of them at my game-room / office and a few white lights at bedrooms.
Ingredients needed :
- Ring Central Dev Account: https://developers.ringcentral.com/
- Hue developer account: https://developers.meethue.com/
- PHP
- Bonus step
STEPS:
1.- HUE Philips API
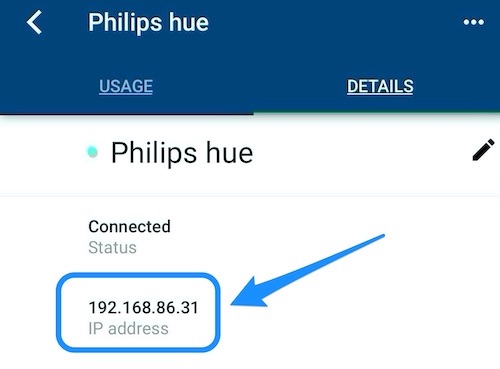
You need to discover the IP address of the HUE Philips bridge network.
The easiest way is to try this address: https://discovery.meethue.com/, if you can’t find it there, you can also try this detailed steps from the developers at HUE, or like I did, just check the IP at your router. I have three Google routers inside my home, and they work flawlessly, I just opened the Google Wifi app and checked for all connected devices and looked for the Philips hue IP:
You can check them out here
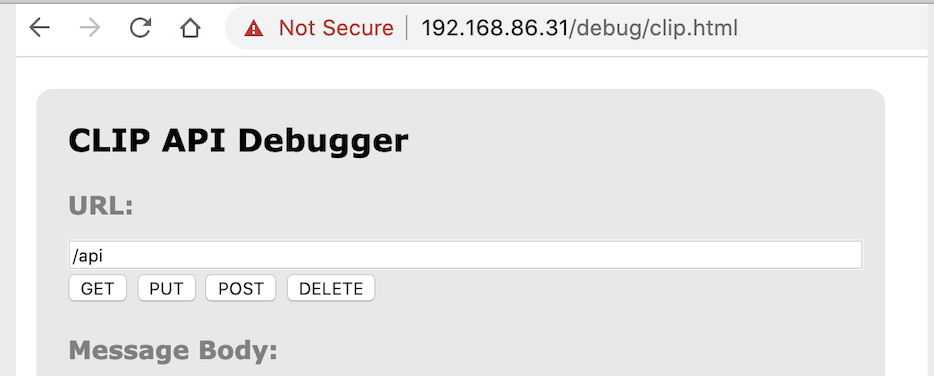
Now that we have the IP, open up a browser and type your IP address followed by /debug/clip.html
This endpoint is HUE’S bridge API debugger:
Let’s generate a username for our device:
- In the URL field type : /api
- In the Message Body field type: {“devicetype”:”my_hue_app#Juan“}
- Hit the POST button.
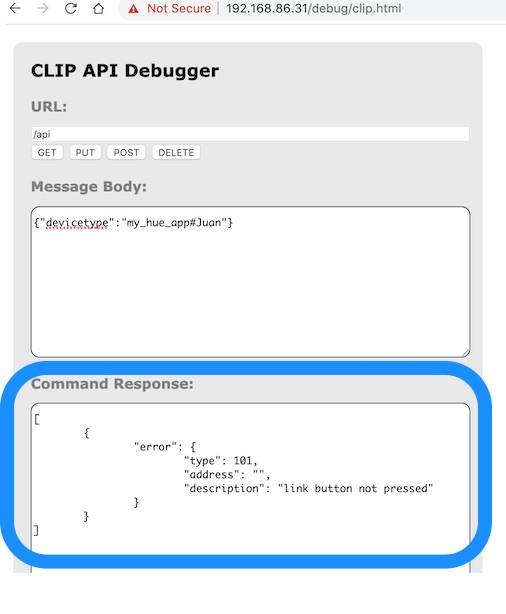
Noticed the error message?
“link button not pressed”
We are missing something important here:
The problem is, that we have to physically authenticate with the device before attempting to create a username.It is a security step to prove that we have access to control the lights. So head over to your hue bridge and press the link button.
Now press that POST again and voila.
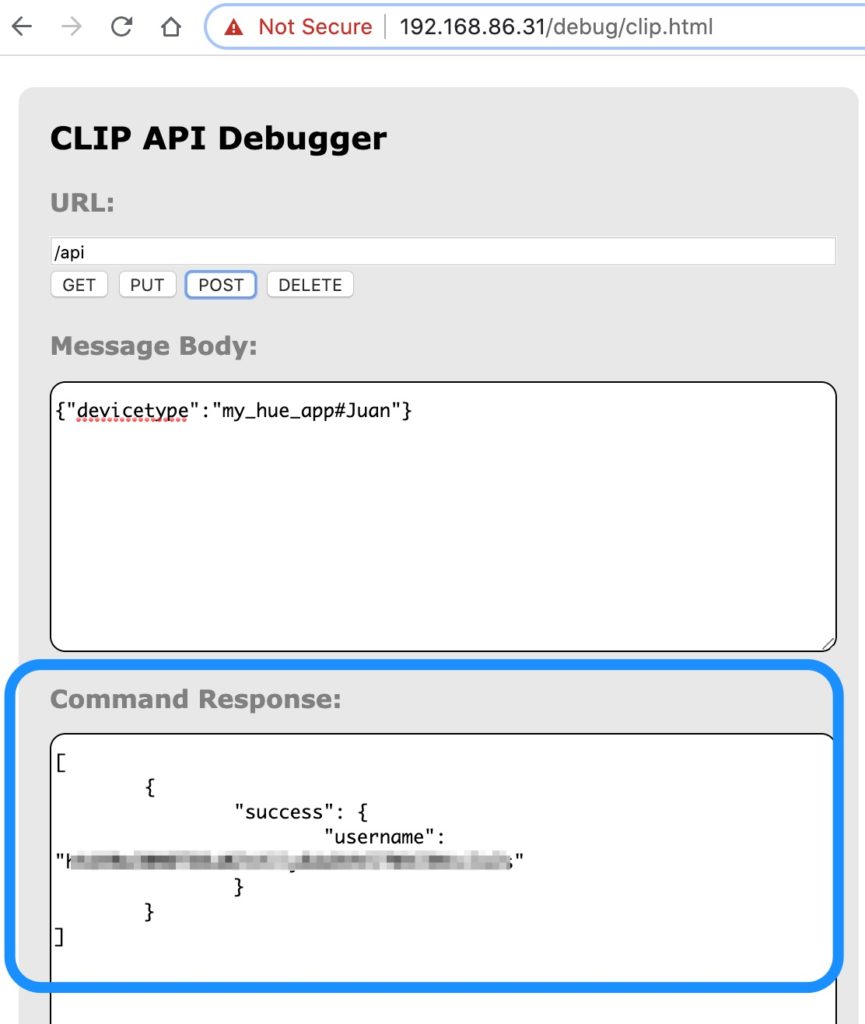
We have now created our username.
Now you have a username with permissions that you can use to interact with all your lights.
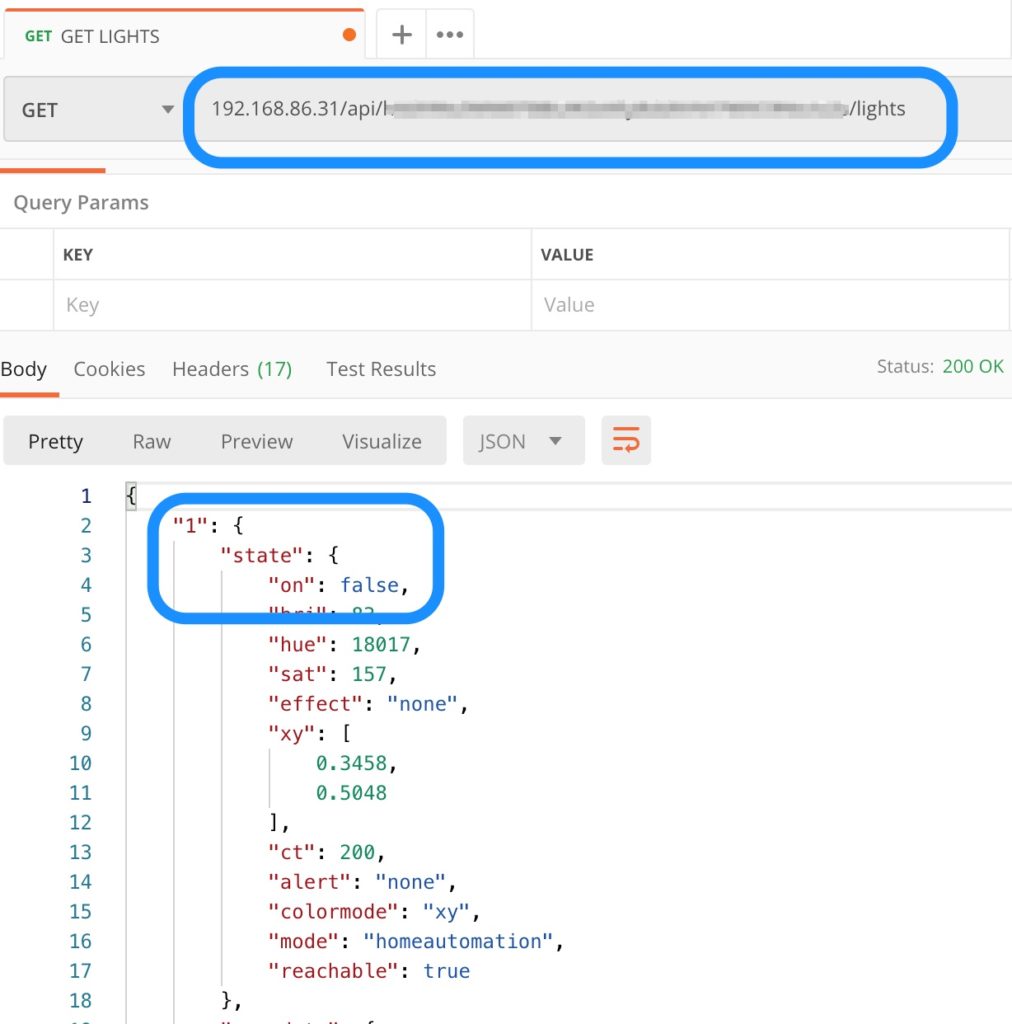
The next endpoint:
https://BRIDGEIPADRESS/api/USERNAME/lights/ returns all the current info on our lights, for this tutorial I am only interested in the light state property named on which is a boolean value. ( true or false).
Here is an example of the API response:
2.- PHP Script
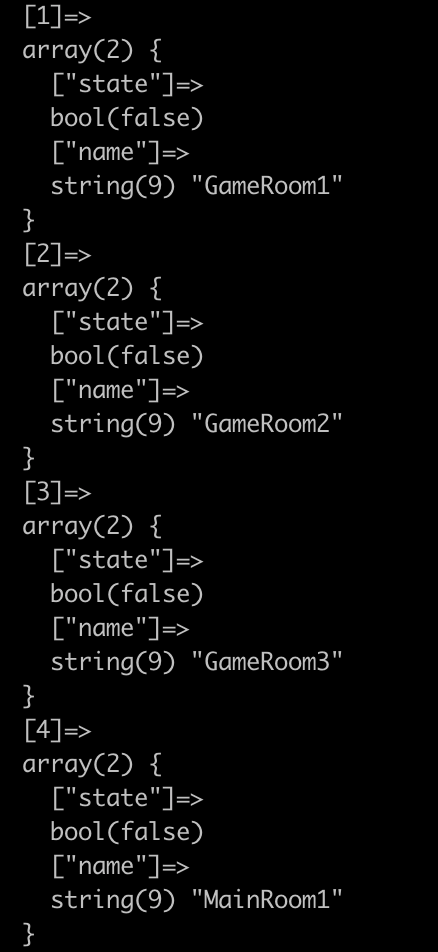
Let’s have more fun now with some coding. We have to create a simple script that will GET the data that we need from our lights. For this example I will get the name of the light and from the state I want to know the on value (true,false).
<?php
$curl = curl_init();

$internalIp = 'YOUR-IP';
$user       = 'YOUR-USERNAME';
$url        = $internalIp.'/api/'.$user.'/lights';

curl_setopt_array($curl,
    [
    CURLOPT_URL            => $url,
    CURLOPT_RETURNTRANSFER => true,
    CURLOPT_ENCODING       => "",
    CURLOPT_MAXREDIRS      => 10,
    CURLOPT_TIMEOUT        => 0,
    CURLOPT_FOLLOWLOCATION => true,
    CURLOPT_HTTP_VERSION   => CURL_HTTP_VERSION_1_1,
    CURLOPT_CUSTOMREQUEST  => "GET",
    ]
);

$response = curl_exec($curl);
$result   = json_decode($response, true);
curl_close($curl);

$lights = [];
foreach($result as $key=> $light) {

    $lights[$key]['state'] = $light['state']['on'];
    $lights[$key]['name']  = $light['name'];
}

var_dump($lights);
In this small script we will save in the $lights array key, value information of our light’s name and state->on.
Here you can see an example of some of my lights:
3.- PHP Script using Ring Central’s SMS API
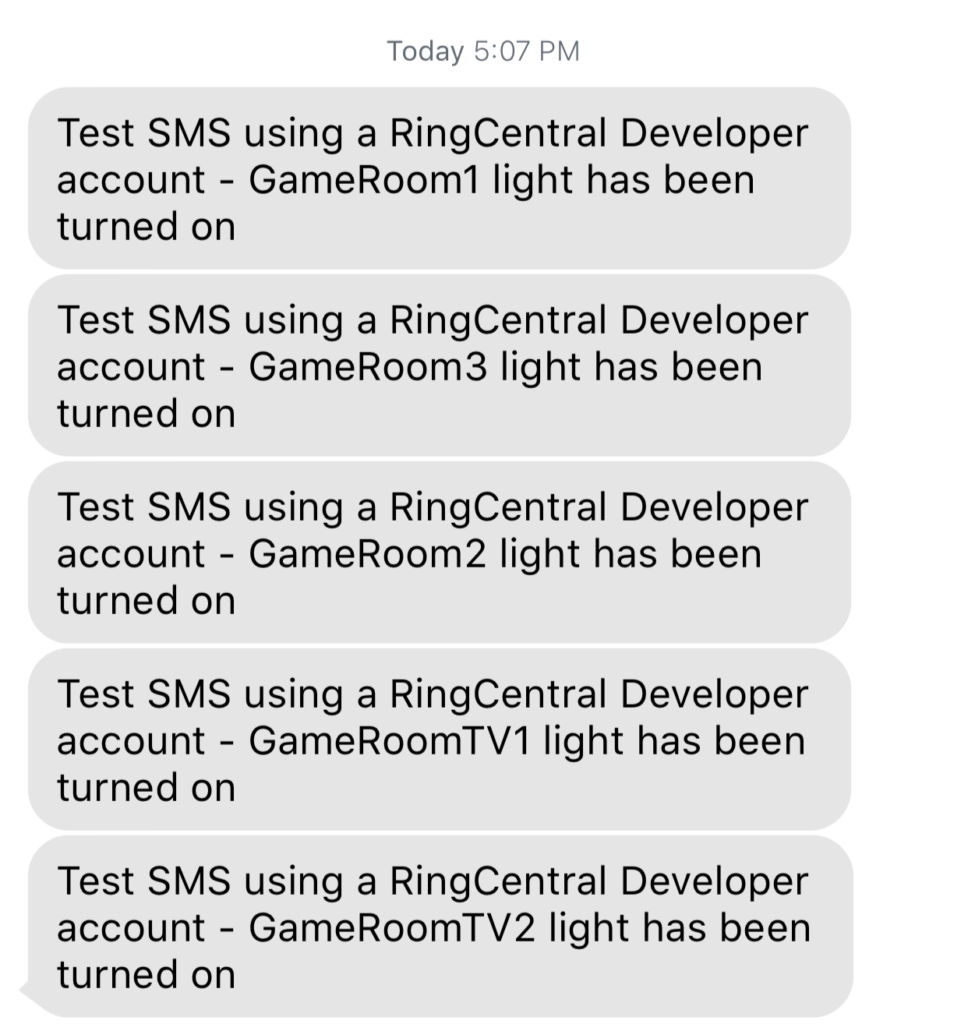
I will use RingCentral’s API to notify if a light state->on property changes to true.
I won’t go into details on how to setup an account with Ring Central, you can follow step by step on this post, check step 5(Setup RingCentral SMS API) it is pretty easy and quick to get a developer account.
We already have the first part that calls HUE’S API:
<?php
require('vendor/autoload.php');

$curl = curl_init();

// Hue Lights credentials
$internalIp = 'YOUR-IP';
$user       = 'YOUR-USERNAME';
$url        = $internalIp.'/api/'.$user.'/lights';

// Call Hue Philips API
curl_setopt_array($curl,
    [
    CURLOPT_URL            => $url,
    CURLOPT_RETURNTRANSFER => true,
    CURLOPT_ENCODING       => "",
    CURLOPT_MAXREDIRS      => 10,
    CURLOPT_TIMEOUT        => 0,
    CURLOPT_FOLLOWLOCATION => true,
    CURLOPT_HTTP_VERSION   => CURL_HTTP_VERSION_1_1,
    CURLOPT_CUSTOMREQUEST  => "GET",
    ]
);

$response = curl_exec($curl);
$result   = json_decode($response, true);
curl_close($curl);

foreach($result as $key=> $light) {
    if ($light['state']['on'] === true){
        smsRingCentralAlert($light['name']);
    }
}
Now we just add RingCentral’s API
// Call Ring Central SMS API
function smsRingCentralAlert($light)
{

    $message = $light. ' light has been turned on';

$RECIPIENT                = 'YOUR-TEST-PHONE-NUMBER';
$RINGCENTRAL_CLIENTID     = 'YOUR-CLIENT-ID';
$RINGCENTRAL_CLIENTSECRET = 'YOUR-SECRET';
$RINGCENTRAL_SERVER       = 'https://platform.devtest.ringcentral.com';
$RINGCENTRAL_USERNAME     = 'YOUR-USERNAME';
$RINGCENTRAL_PASSWORD     = 'YOUR-PASSWORD';
$RINGCENTRAL_EXTENSION    = 'YOUR-EXTENSION';

$rcsdk    = new RingCentral\SDK\SDK($RINGCENTRAL_CLIENTID, $RINGCENTRAL_CLIENTSECRET, $RINGCENTRAL_SERVER);
$platform = $rcsdk->platform();
$platform->login($RINGCENTRAL_USERNAME, $RINGCENTRAL_EXTENSION, $RINGCENTRAL_PASSWORD);

$platform->post('/account/~/extension/~/sms',
    [
        'from' => [ 'phoneNumber' => $RINGCENTRAL_USERNAME],
        'to'   => [['phoneNumber' => $RECIPIENT]],
        'text' => $message
    ]
);
}
Remember to use your credentials!
If everything goes well, you should receive a sms for each of your lights that is on.
4.- Bonus step – Cron Job
In order to keep checking if the lights are on, we would have to run our PHP script again, and again and again, this is an endless task todo manually, if we use a simple cron job that checks the light status for us that would be a lot easier.
- To create a cron job we need a few ingredients:
- Timing – Set minutes, hours, days, months
- Execute – The cron job needs to the PHP exe to run.
- Path to script – Full path of where your script is located.
- Output – (optional) you can save the output of your script or log errors.
To create a cron job just open your CLI and type:
crontab -e
Make sure to check your current path to your PHP exe. This command will help:
whereis php
The php path is usually :/usr/bin/php
After you run the crontab, most likely an editor will open, this is an example of the cron I used for this post:*/1 * * * * /usr/bin/php /Users/juan/DEV/RingCentral/smsLights.php >/tmp/stdout.log 2>/tmp/stderr.log
The first part sets the script to run every minute: */1 * * * *
Next is the route to my php exe file /usr/bin/php
Now we need the full path to our script /Users/juan/DEV/RingCentral/smsLights.php
And finally I decided to add a log:>/tmp/stdout.log 2>/tmp/stderr.log
This is just a simple script that tries to explain how to use all this tools together, after you test remember to comment your cron job, or change the timing, or else you will be spammed every minute haha.